How To Use Bleed & Safe Zone Label Tools
Maestro Label Designer makes it easy for designers of any skill level to design for printer shifting. Continue reading the instructions below to learn more about bleed and safe zones, then enable the on-canvas guides.
About Bleed
Bleed is a term used by designers and printers. It refers to the process of extending artwork past any cut lines so that once the page is trimmed or the label peeled, the design extends to the very edge and there are no unprinted edges.
Watch the video below to learn more about bleed or visit our tutorial on how to design for bleed.
About Safe Zone
Safe zone is another technical term to describe the interior-most section of your label. If your label sheets shift during printing, this section is far enough inward that it's unlikely to fall outside the cut lines. All critical information should be included within the safe zone boundary.
Watch the video below to learn more safe zones.
How to Turn On & Use Printing Guides
Launch Maestro Label Designer and sign in.
-
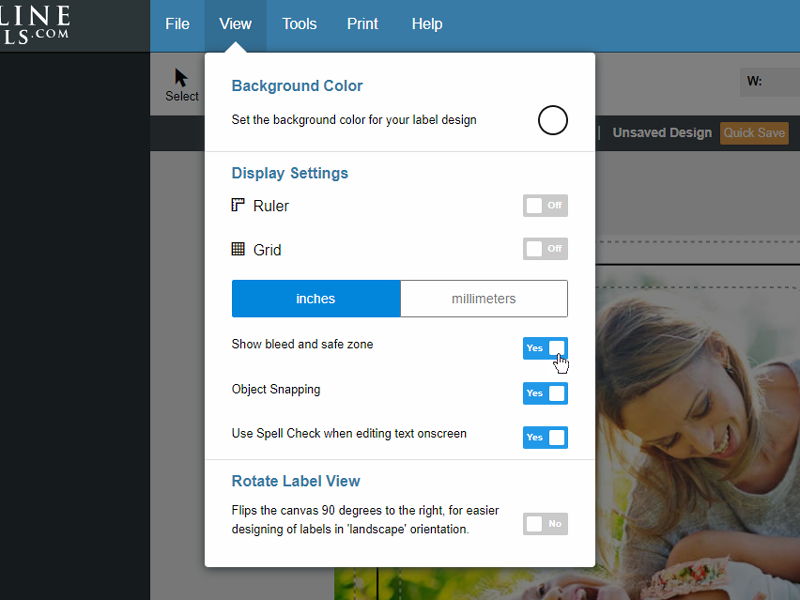
With your label template open, hover over "View" in the blue navigation bar then click the toggle for "Show bleed and safe zone."
-
Extend your design all the way to the exterior dotted line to create your labels with bleed.
-
Keep important elements (like words and logos) within the interior dotted line to observe the safe zone.
-
Look out for warnings. When the recommended bleed or safe zone conditions are not met, the dotted line will turn red and a warning will appear.
If you need additional support using the bleed and safe zone guides, our customer service team is happy to help. Please call 0203 051 9664.