How To Create Product Videos For Your Small Business
Our videographer and video editor is stepping in front of the lens to share his expertise with our community of small business owners. But forget expensive equipment and technical editing software. In this tutorial, you'll find out how to create content for your business using things that are available in your home.
Follow along as we go over the planning and pre-production steps, actually shoot the video, and edit together your masterpiece. This is proof that product videos can be done for little money, without a lot of extra equipment, and without a huge time commitment.
Importance Of Video
Product videos are an incredibly helpful way to promote your listings and give potential customers an in-depth look at your products.
We feature product videos on nearly all of our product pages, and popular selling platforms like Amazon let you include product videos for each listing. Having a library of product videos also gives you more content for social media where engagement on video is huge.
Video Equipment & Setup
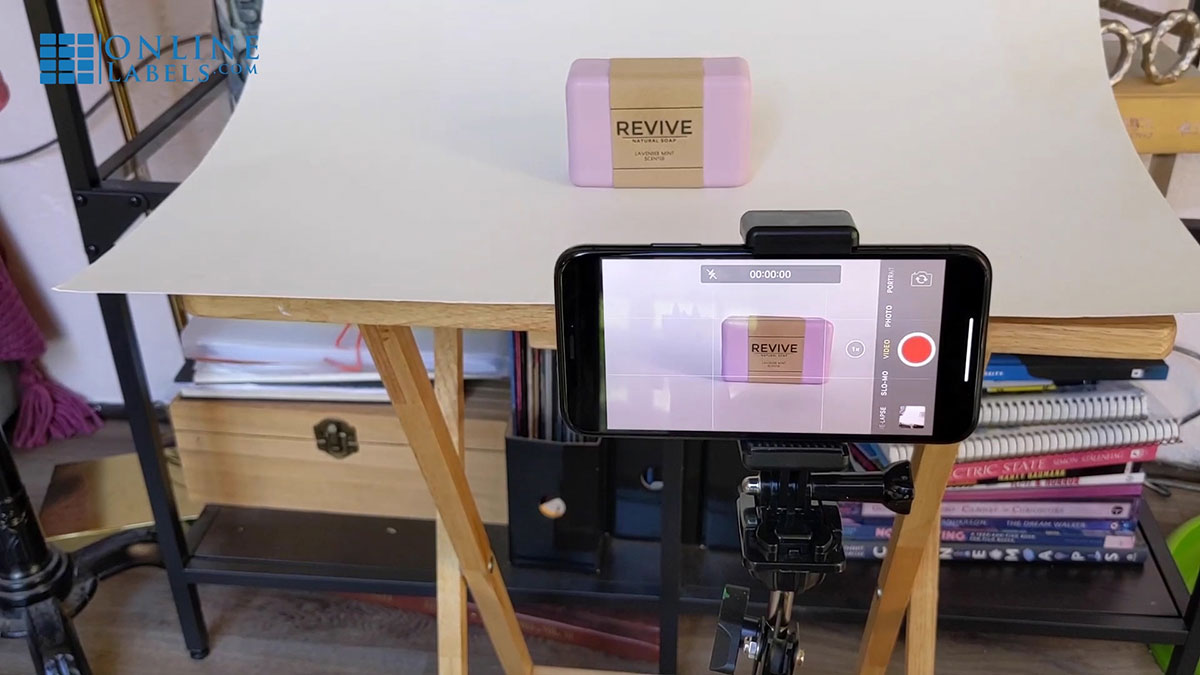
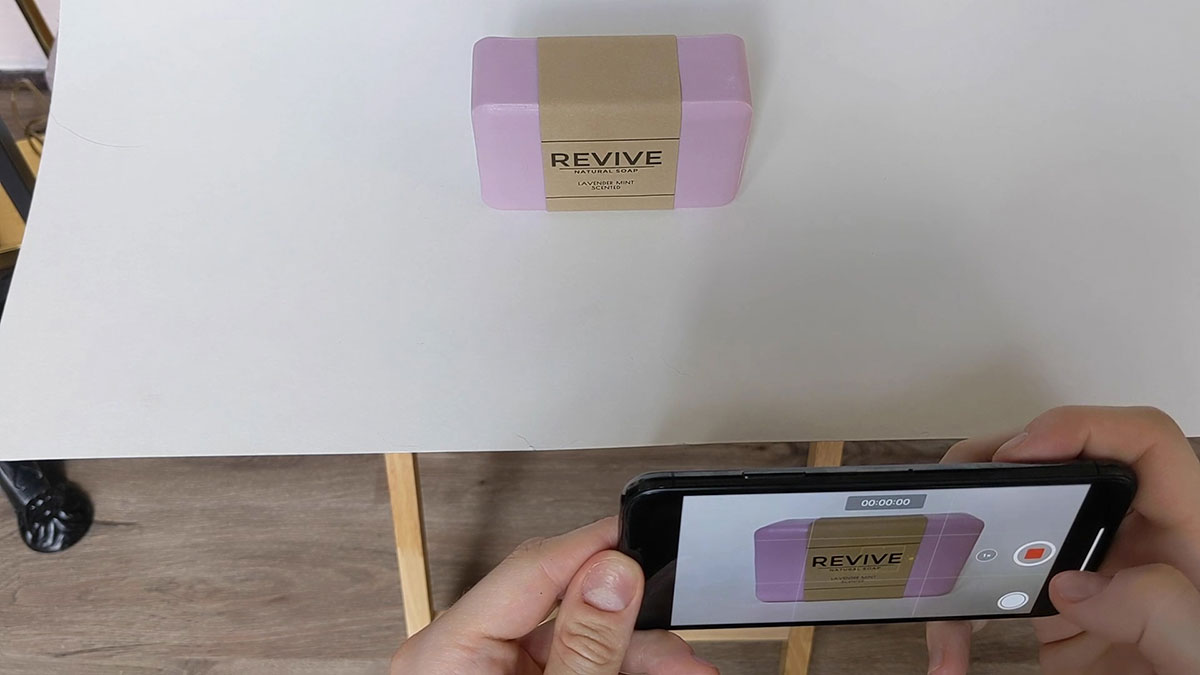
Obviously if you're making a video, you're going to need a camera. There's no need to spend a ton of money on a DSLR or other expensive model. If you have a recent smartphone, it will have a camera that can produce high-enough quality videos. We actually use an iPhone8 in the accompanying video.
If you want to shoot steady shots, you may want to consider buying a tripod for your phone. These can be found online for a nominal price.
You can even try making a phone-mount yourself using items around the house. Books, coffee mugs, and other heavy items will work fine.
Lighting is also an important aspect of product videos. Natural light will do the job, so position your setup near a window. Be sure to experiment with filming at different times of day to see what kind of light works best for your videos.
If you want to invest in professional lighting, there are some relatively inexpensive lights available online.
And then there's the background. This varies depending on your product, but you can either go for something more neutral or themed.
Neutral backgrounds are great for easy set up and consistent looks throughout your listings. They are also a good choice if you sell things like apparel so that the colour is clearly shown and not influenced by the surrounding environment. They can be easily achieved with only a large piece of poster board.
Themed backgrounds are left a little up to interpretation. You will want to find a location or background that matches the look of your products. If you're selling a beauty or cosmetic product, for example, you'll want your videos to take place in a bathroom or on a vanity. If you decide to use themed backgrounds, make sure you try to keep some consistency between them so your brand is well maintained.
Lastly, props can be used in both types of backgrounds. They are a great way to show off different scents, flavors, or variations of your product.
Phone Video Production Tips
Keep the following tips in mind when using a phone to create a professional small business video.
Shoot Horizontally
Vertical video is fine for Instagram Stories and other social media platforms, but horizontal video is a must for videos on your site and product listings.
Steady Your Hand
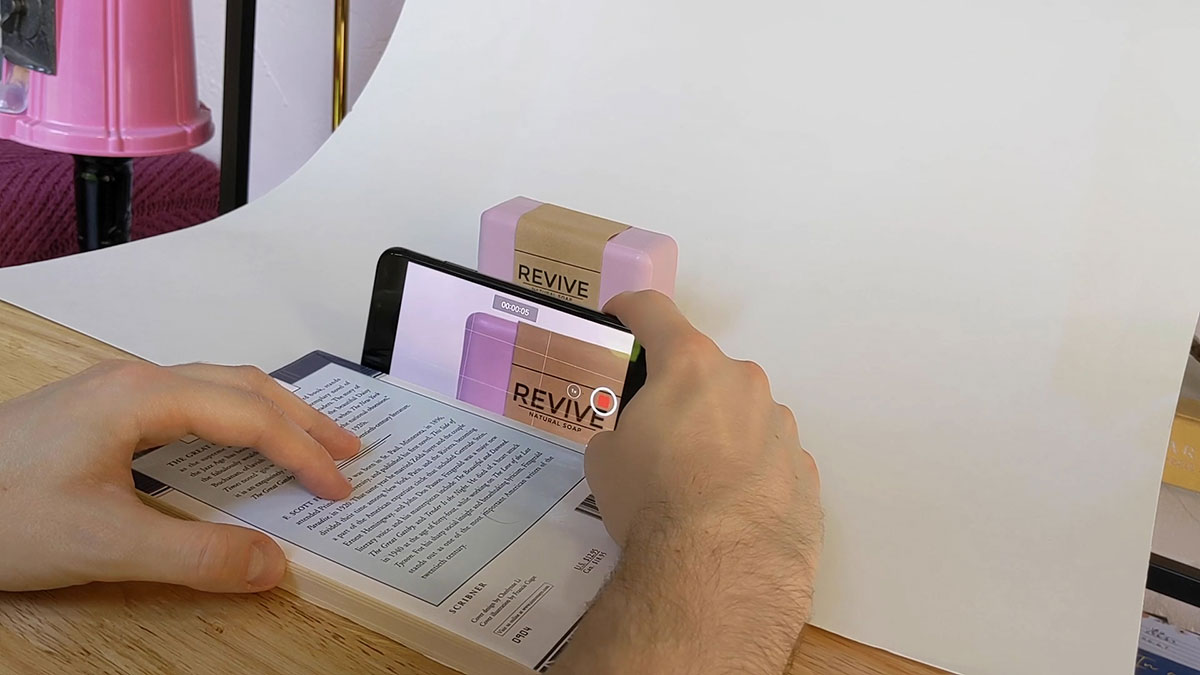
Keep your shots as steady as possible. This is where a tripod or other makeshift setup will come in handy. You want at least one base shot to be totally still. After that, you can move into some handheld shots of close ups and alternate angles. On shots with movement, be very still and slow. You also want to move in the same direction when possible.
Vary Your Shots
Shoot multiple angles and distances. Capture any details of your product that you want to show off in close ups.
Check Your Lighting
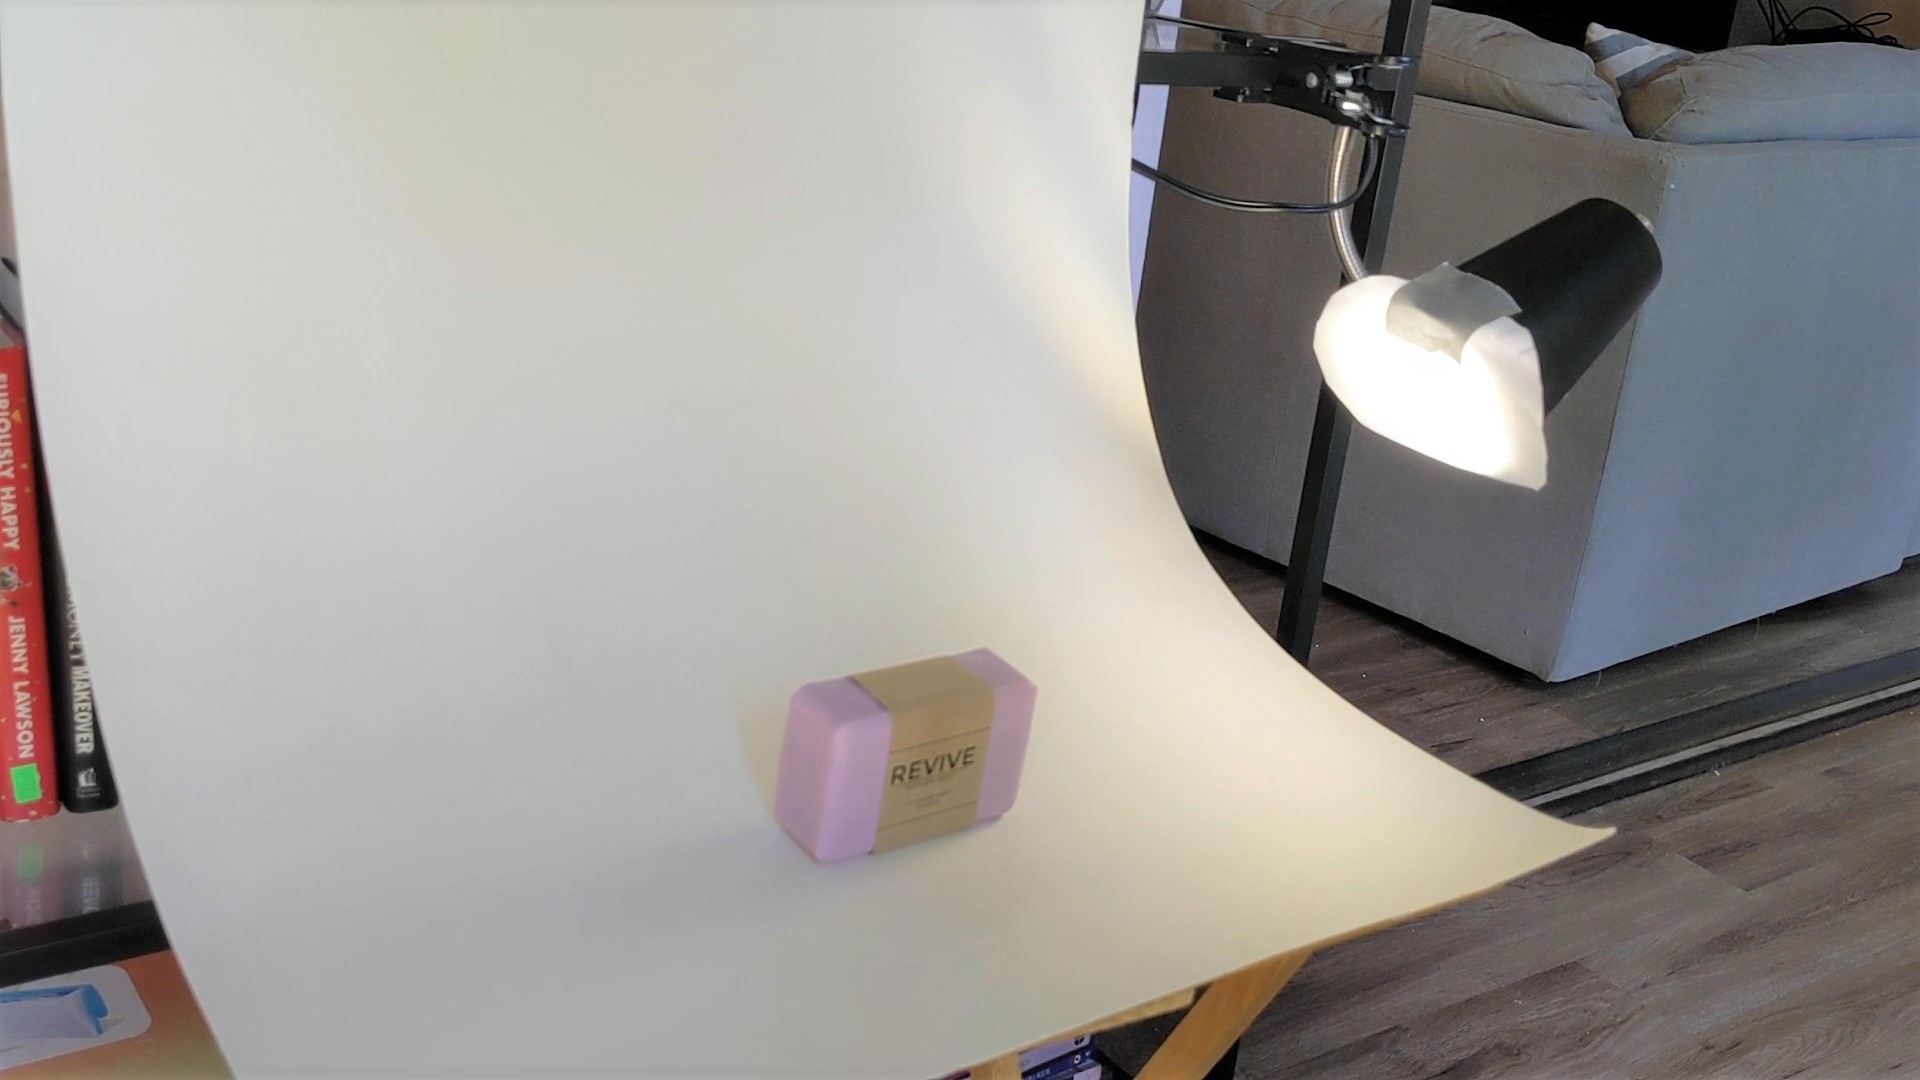
If the lighting looks uneven coming from your windows, use a lamp or other light source to fill in the voids. Placing a piece of paper in front of the light is also helpful if it looks too harsh.
Focus First
Make sure your product is in focus before you start recording. Simply tap on the product on your screen before hitting go.
Shooting Your Product Video
Now you're ready to get started shooting. We recommend outlining a shot list. We'll be shooting a full shot of the item, a couple of moving close-ups, and then one small action shot for the ending.
These aren't specific rules to follow, you can do whatever shots you feel best represent your products and brand. If you look at our product videos, you'll see that they follow more of the customer journey to show what you can make with our labels. This is just a good starting point if you're creating an outline from scratch for your product videos.
Go ahead and shoot those clips in different takes. And take several of each so you have options to choose from when it's time to edit.
Editing Your Product Video
Now it's time to bring your product video to life.
Choose Your Video Editing Program
There are a ton of different video editing programs for phones and computers. On the phone, Adobe Premiere Rush is free to download and available for Apple and Android operating systems. It syncs with the rest of the Adobe Creative Cloud, so if you want to get more serious about video editing in the future, this should make for an easier transition.
On the computer, Adobe Premiere Pro is a popular option. It isn't free, but it is recognised as a leader in the industry. If you don't want to spend any money on editing software, there are plenty of free options available. If you have a Mac, you can use their free video editing software: iMovie. Programs like Lightworks are also free and will work for making your product videos.
Each editing program will have a different layout and set of features, so if you don't have any experience with your chosen app/software, you may want to look up a tutorial first.
Organise Your Video Footage
Go through all of the shots you took and pick out the ones you want to use for your video. You're going to need your establishing shot, about 3-to-4 close ups, and your action shot (if you took one). If you didn't, you'll just be reusing your establishing shot.
Upload those clips into your editing software.
Remove The Audio
Once you get all of your footage imported into your project, you're going to want to delete all of your audio tracks. These will just have the background noise from whatever you were filming and isn't needed for this video.
Stitch Your Shots Together
When editing your video, you're going to want to start with the wide establishing shot of your product. This shot should only last for 3-5 seconds.
Then you're going to cut to your moving close-ups. Those shots should only be about 2 to 3 seconds each and should be trimmed so that they start and end while the shot is still moving. Pick frames where your product is still taking up a lot of the screen.
After that, drop in your action shot if you took one. If not, duplicate your establishing shot and bring it to the end of your timeline.
In the tutorial video, we used the following sequence: establishing shot, shot that moves horizontally, shot that moves vertically, shot that moves horizontally, establishing shot.
Finalize & Export
Now that your shots are cut together, make the colouring and lighting of your shots look consistent by colour correcting and colour grading them. Play with the temperature and tint sliders if your footage looks yellow or blue from the lighting.
You may also want to increase the contrast. This is a simple edit that will make the highlights and whites of your footage brighter, and the shadows darker.
Add some background music to your video if you wish, and then your video is complete and you're ready to export!
Download the video to your phone/computer then upload to YouTube, social media sites, and your website listings.
With that, you should have a completed product video ready to share online with your customers. Keep in mind that this is just one way to make a product video, there's no wrong way! As you get more comfortable shooting, editing, and producing videos, you can start to make them more unique to your brand and product.
While you have your props and products all together, learn more about product photography and marketing those photos on online marketplaces.