4 Tips for Creating Personalised Round Labels

Circular labels can be the perfect complement to your packaging, product, container, logo, or design. But before you get started, prepare for the shifting that naturally occurs during the printing process. Below, you'll find tips and suggestions that will help you design and print show-off-worthy round labels.
1. Add a Bleed
"Bleed" is a term used in the design and printing industries. Designing with bleed means adding more "cushion" to the edges of your design. This ensures your final print achieves total coverage. Imagine magazines, for example. The pages are printed on oversize sheets then cut down to size. Picture your labels the same way – you print an entire sheet then peel up the final piece, a smaller version than the original.
How do you add a bleed to your design? If you've applied a background colour, Maestro Label Designer takes care of this for you. It will automatically print an extra 3.175mm of your background colour around your label. If you're using images or shapes along the edge of your label, have them overflow onto your canvas.
Those are a few hard and fast rules. For specifics, follow these step-by-step instructions on how to add bleed.
2. Apply a Safe Margin
Unlike shapes and backgrounds, you don't want to bleed everything – in fact, you may want quite the opposite. Take text, for example. You don't want any valuable information to get cut off. The same principle applies for images and clipart that aren't complete in their entirety. For this reason, we recommend leaving at least 3.175mm of space between your design and the border of your label.
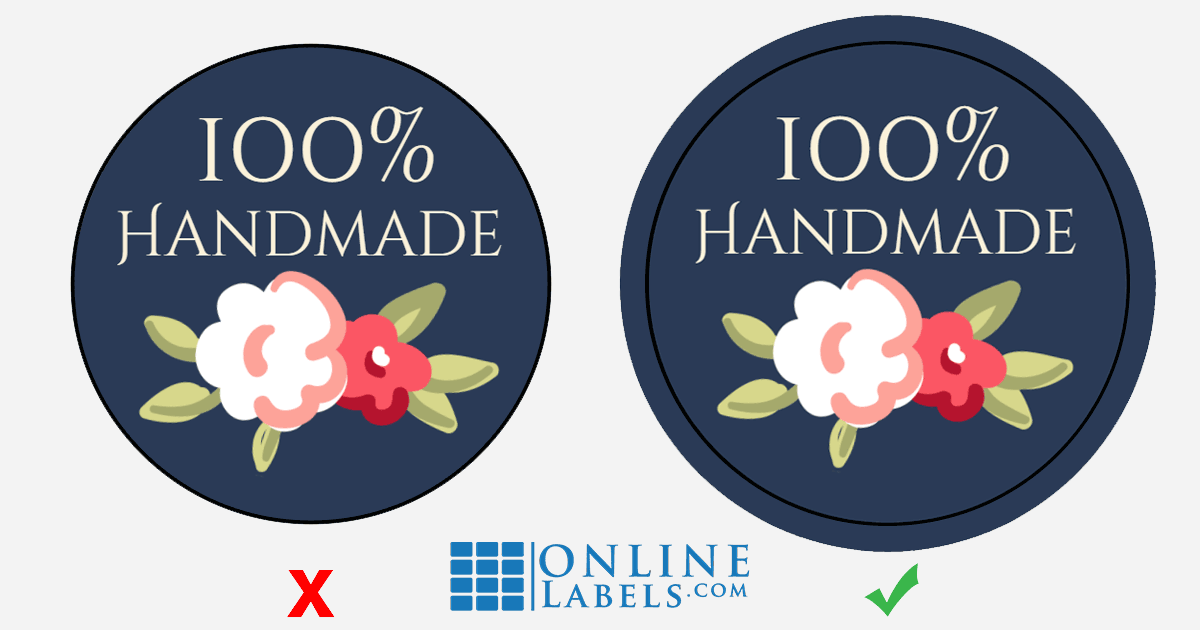
3. Go Borderless
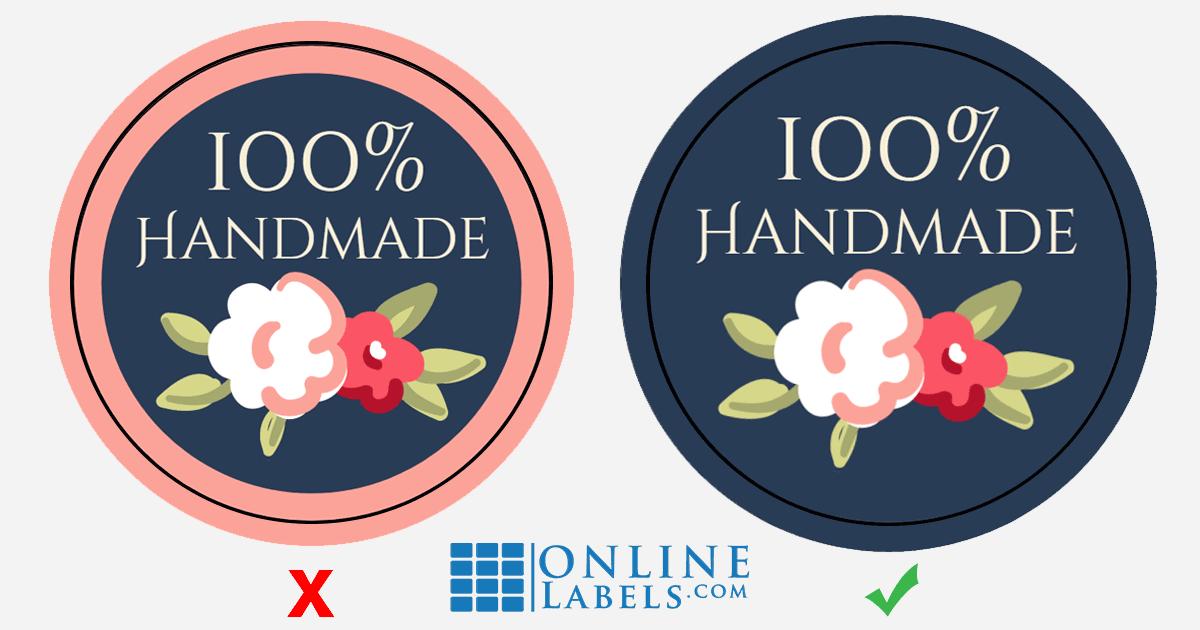
If a circle doesn't print exactly in the centre, having a border in the design can be a dead giveaway. If using a border is crucial to your design, the thicker it is, the less noticeable any shifting will be. If you can forgo the border, try adding a patterned background instead for a similar effect.
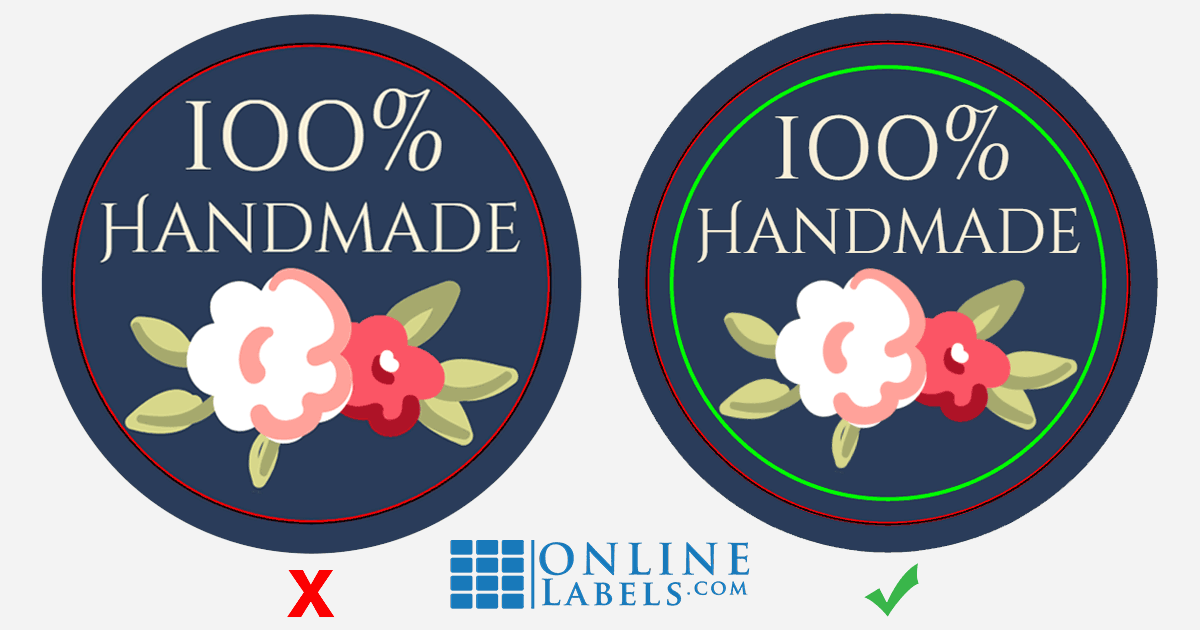
4. Omit Circles
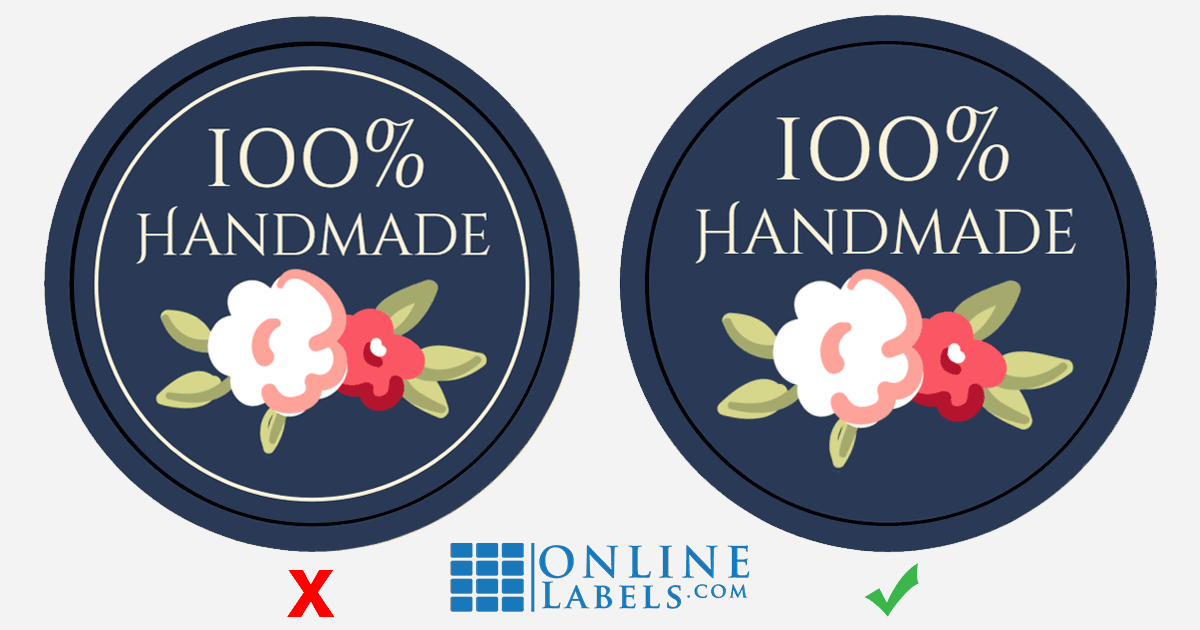
This tip goes hand-in-hand with eliminating borders. Circles within circles produce the same effect but in reverse, making any printer shifting more obvious. Instead of creating geocentric circles, play with the size and positioning of the interior circles. Significantly smaller circles like polka dots don't create the same problem.
For more helpful articles, check out our Label Learning Centre. Ready to get started? Grab a pre-designed circular template for your labels and get going!