Design Interface
Updated
03/31/2025

Learn where to find all the tools you need to make using Maestro Label Designer quick and easy! When you're all caught up, launch Maestro Label Designer and sign in to get started creating your custom labels.
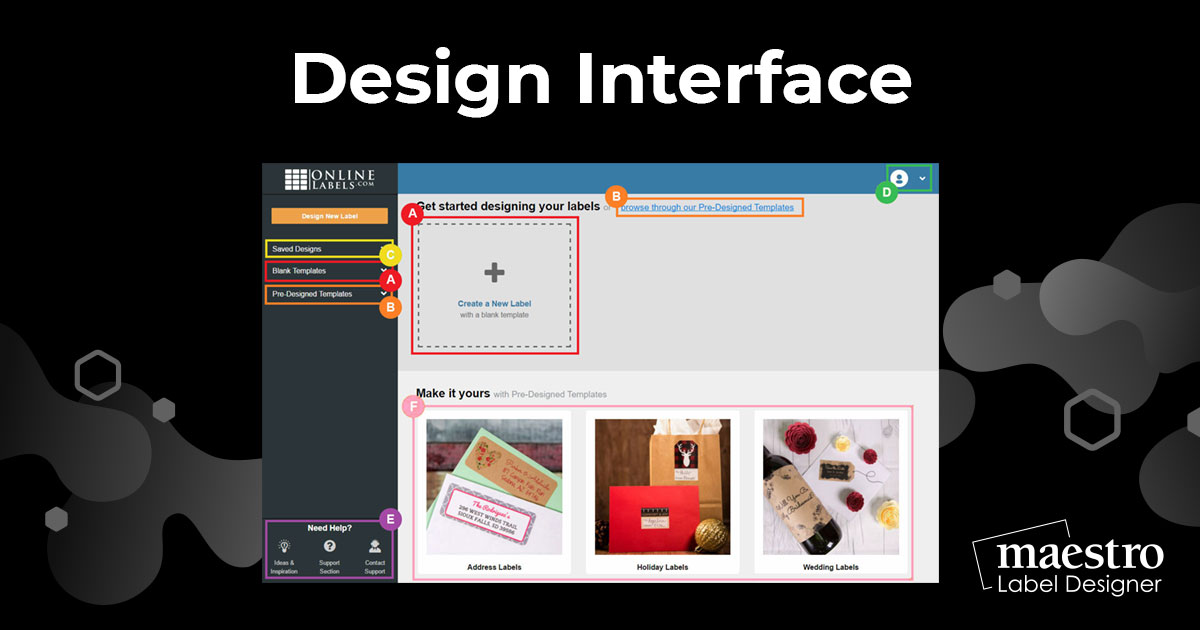
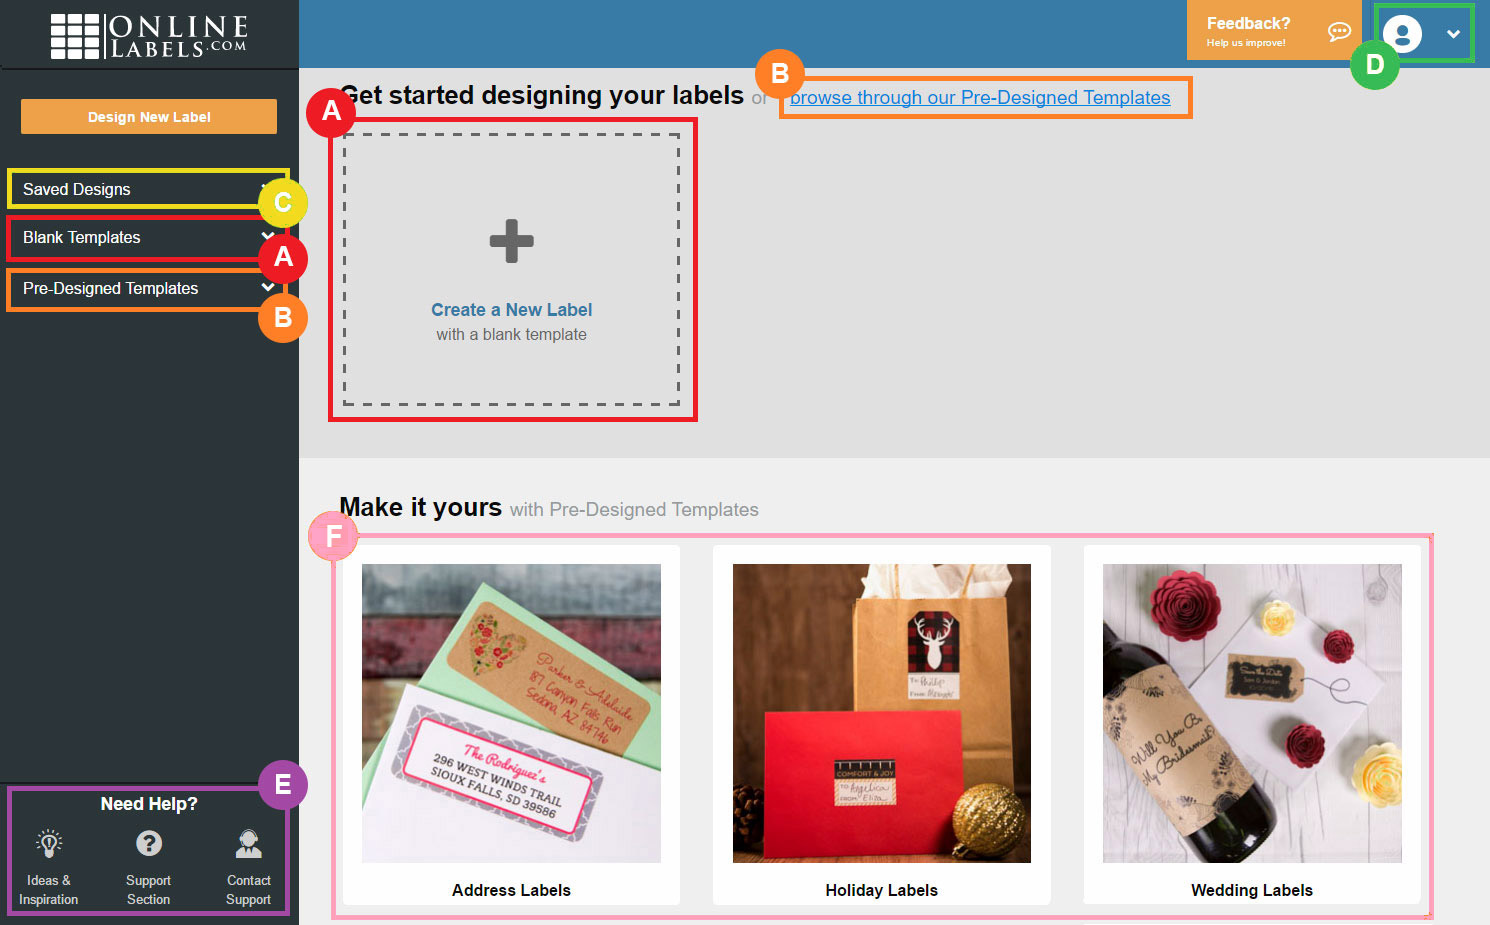
Home Screen

Blank Labels - what you click to open a blank template
Pre-Designed Templates - where you can go to search through pre-designed options
Saved Designs - how you find designs you've saved
Profile Icon - where you access your account and activation information or sign out
Support Tools - where you can find various forms of help
At-A-Glance - where you can easily access your most recent designs or search through popular pre-designed categories
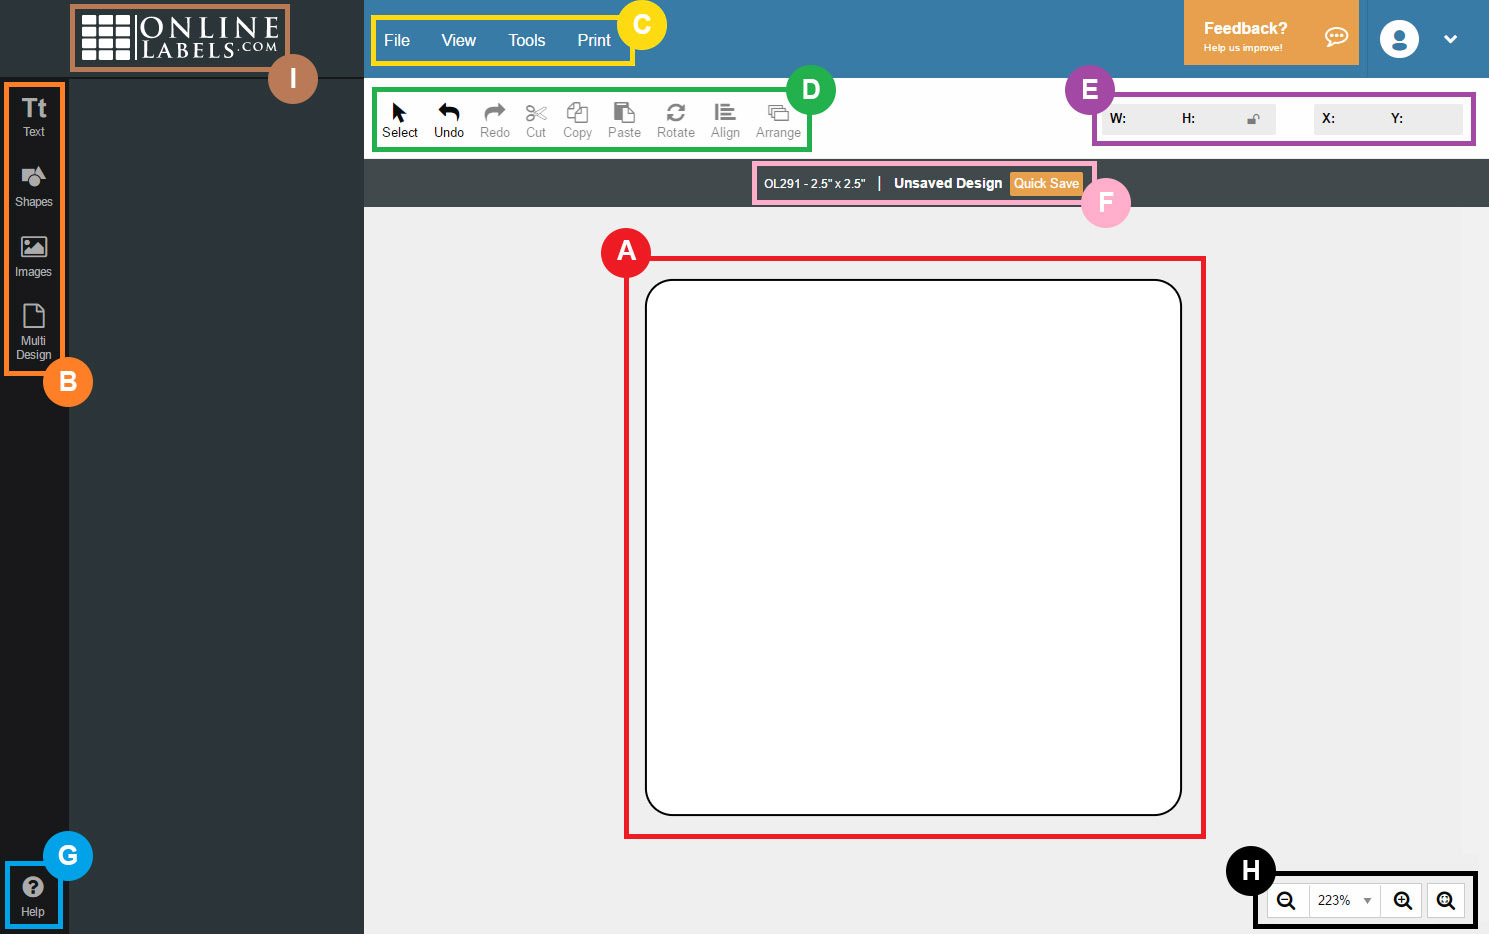
Design Screen

Label - where you create your design
Design Toolbar - how you add and edit text, shapes, and images and manage multiple designs per sheet
Menu Toolbar - where you access essential functions like save and print
Object Toolbar - how you manage selected objects
Position Controls - where you change the size and location of objects
File Information - where details about your file are displayed and you can save your design
Support Button - where you can find various forms of help
Zoom Tools - how you control your view in the design window
Home Icon - how you get back to the home screen
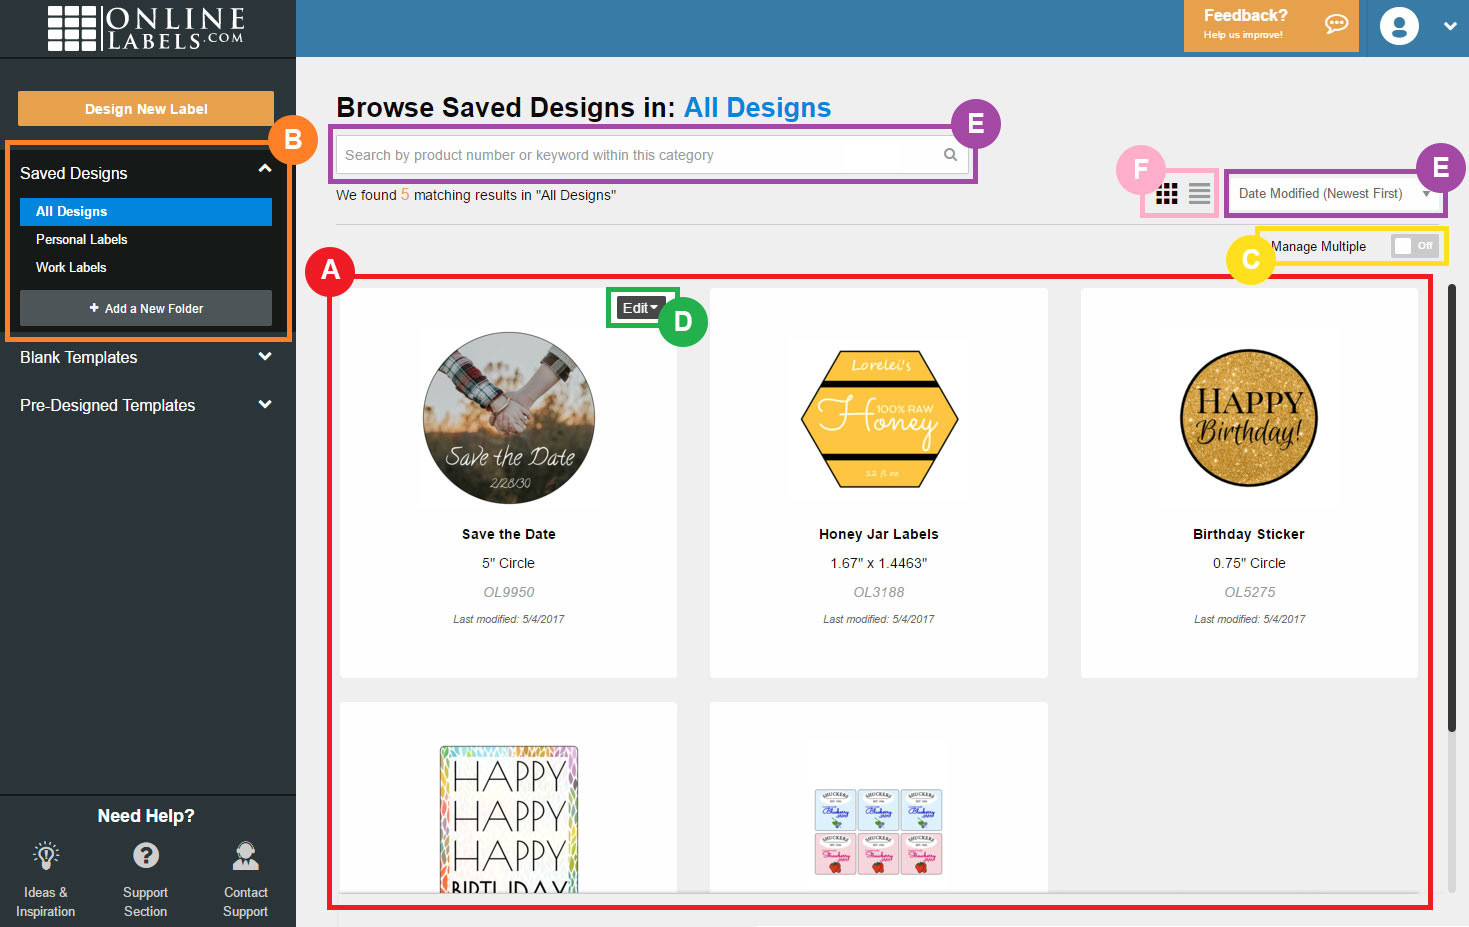
Saved Designs Screen

Saved Designs - where you can view your saved designs
Saved Design Folders - where folders created in your account are located
Manage Multiple Toggle - how you can move or delete various designs at once
Edit Menu - how you can move, rename, or delete a saved design
Sorting Dropdown - what you click to reorganize your saved designs
View Icons - where you can switch between thumbnail and list view


