How To Crop Images In Maestro Label Designer
Updated
03/31/2025
Follow these steps to crop your image for the perfect label design.
How to Crop An Image
Launch Maestro Label Designer and sign in.
-
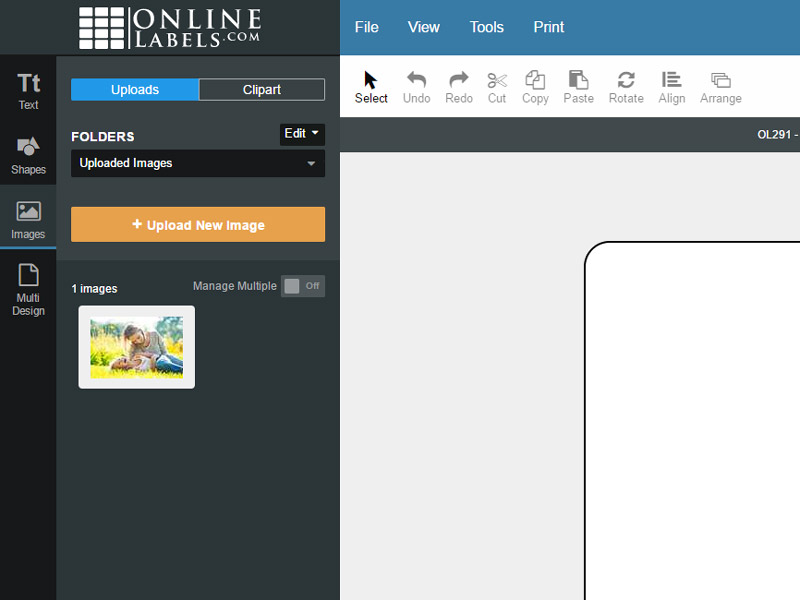
With your label template open, click on the "Images" icon in the vertical toolbar to the left of the screen.
-
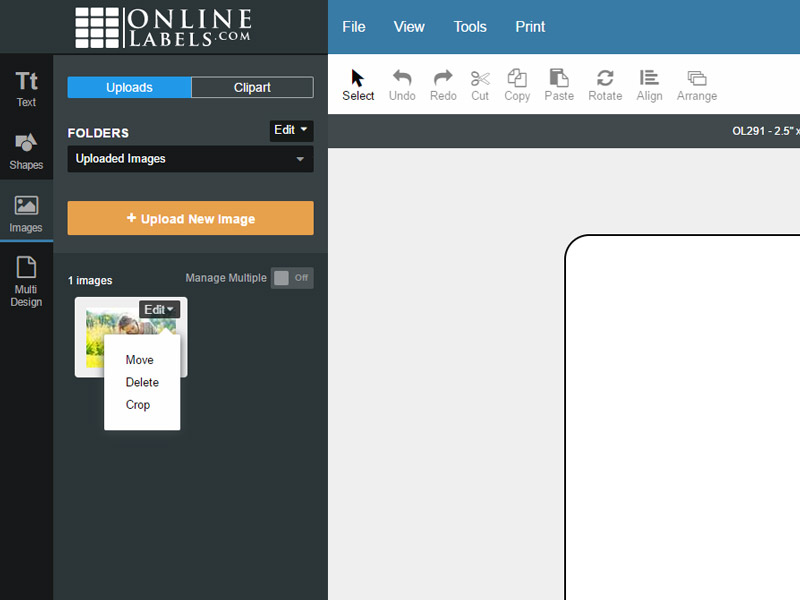
Hover over the image you would like to crop and click the "Edit" button that appears on the thumbnail.
-
Click "Crop."
-
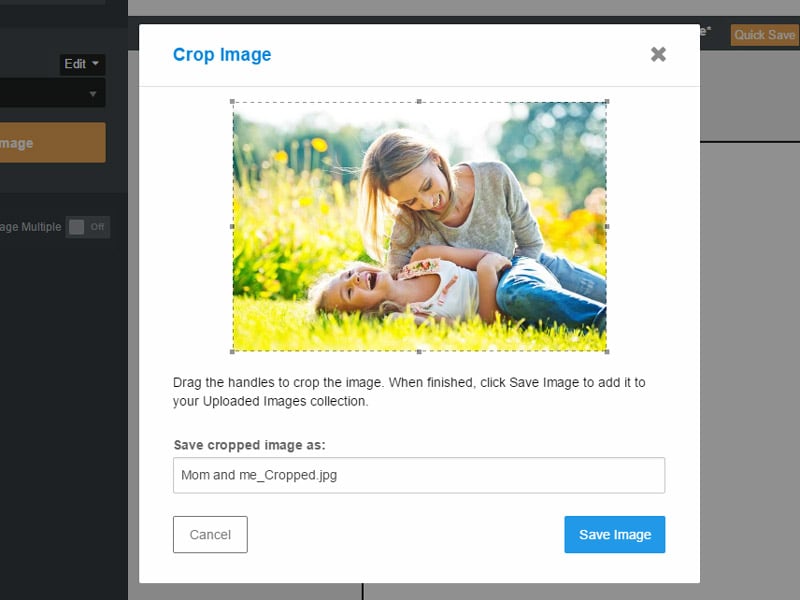
Resize your photo and hit "Save Image" when ready. The newly cropped image will save to your "Uploaded Images" folder.
-
Proceed with adding it to your canvas as normal.
Need help with your specific part of the process? Speak with our support team by calling 0203 051 9664.